How to Change Computer Sleep
Change Computer Sleep After Time in Settings
This will change the sleep after settings in your currently selected default power plan.
1 Open Settings, and click/tap on the System icon.
2 Click/tap on Power & sleep on the left side, and select the Sleep time you want in the On battery power, PC goes to sleep and When plugged, PC goes to sleep drop menus on the right side. (see screenshot below)
If you PC doesn't have battery power, then you will only see one option.
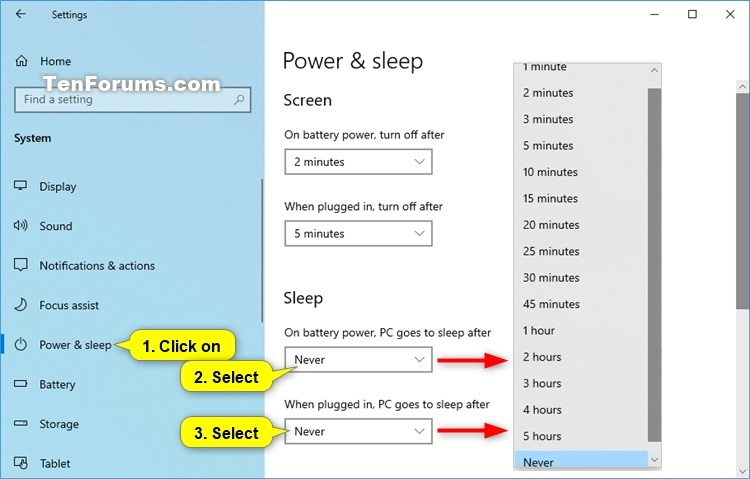
3 When finished, you can close Settings if you like.
Change Computer Sleep After Time in Power Plan Settings
This will change the sleep after settings in your currently selected default power plan.
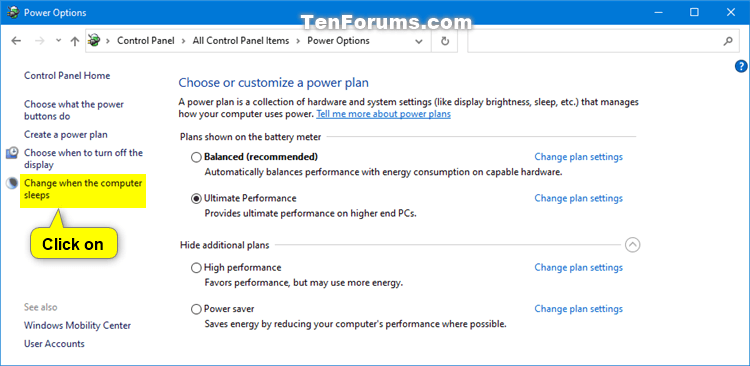
1 Open the Control Panel (icons view), and click/tap on the Power Options icon.
2 Click/tap on the Change when the computer sleeps link on the left side. (see screenshot below)
3 Select the Put the computer to sleep times you want in the On battery and Plugged in drop menus, and click/tap on Save changes. (see screenshot below)
If you PC doesn't have battery power, then you will only see one option.

4 You can now close the Edit Plan Settings window if you like.
Change Computer Sleep After Time in Advanced Power Plan Settings
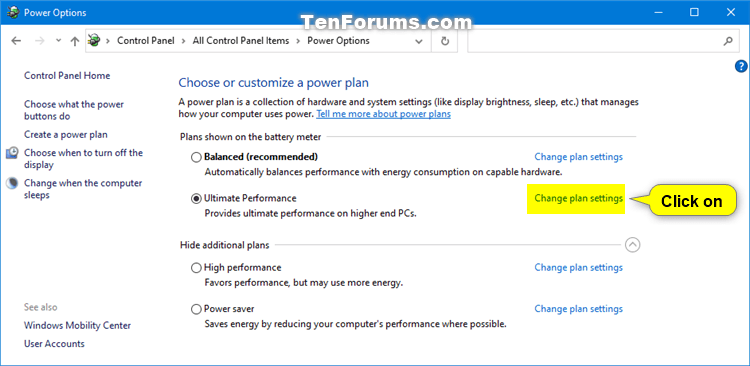
1 Open the Control Panel (icons view), and click/tap on the Power Options icon.
2 Click/tap on the Change plan settings link of the power plan (ex: "Ultimate Performance") you want to apply this to. (see screenshot below)
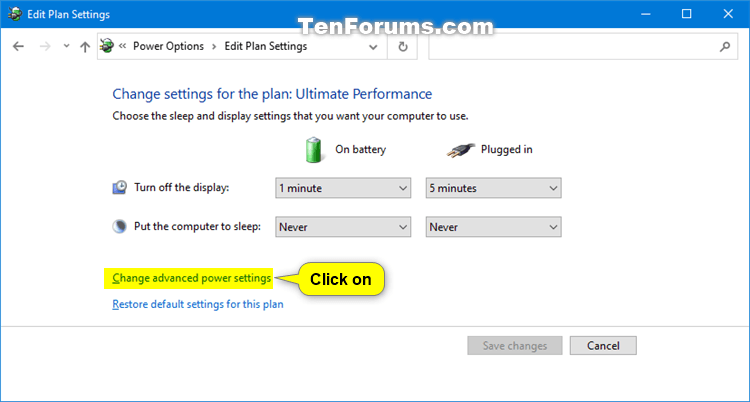
3 Click/tap on the Change advanced power settings link. (see screenshot below)
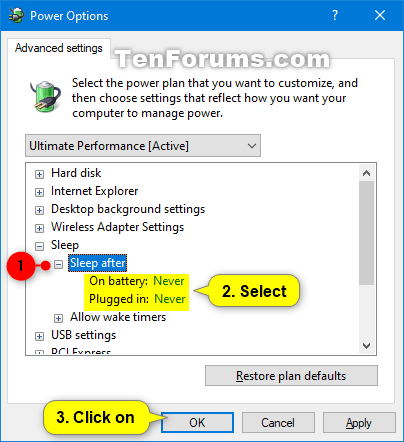
4 Scroll down and expand Sleep and Sleep after. Select the On battery and Plugged in times you want, and click/tap on OK. (see screenshot below)
If you PC doesn't have battery power, then you will only see one option.
5 You can now close the Edit Plan Settings window if you like.
Change Computer Sleep After Time in Command Prompt
This will change the sleep after settings in your currently selected default power plan.
1 Open a command prompt.
2 Type the command(s) below you want to use into the command prompt, and press Enter. (see screenshot below)
(On battery)
powercfg -change -standby-timeout-dc <minutes>OR
powercfg /SETDCVALUEINDEX SCHEME_CURRENT 238C9FA8-0AAD-41ED-83F4-97BE242C8F20 29f6c1db-86da-48c5-9fdb-f2b67b1f44da <seconds>AND/OR
(Plugged in)
powercfg -change -standby-timeout-ac <minutes>OR
powercfg /SETACVALUEINDEX SCHEME_CURRENT 238C9FA8-0AAD-41ED-83F4-97BE242C8F20 29f6c1db-86da-48c5-9fdb-f2b67b1f44da <seconds>Substitute <minutes> in the commands above with how many minutes you want for how long your computer is inactive before automatically going to sleep.
Substitute <seconds> in the commands above with how many seconds you want for how long your computer is inactive before automatically going to sleep.
Using 0 (zero) minutes or seconds will be the same as Never.
3 When finished, you can close the command prompt if you like.
